Sew Katie did: Messing with Magic Numbers: “Magic numbers can make improvisational quilt construction that seems impossible a little more within reach.”
Seemingly random squares and rectangles all fit together. Looks like something I want to try someday.
Category Archives: Sewing
Another finished quilt
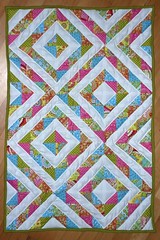
I just finished my first quilt that consists of half square triangles instead of squares or rectangles.
I bought a jelly roll of Jenean Morrison‘s California Dreamin’ fabric line at the Nadelwelt Karlsruhe back in May and spent quite some time deciding what to do with it.
I wanted to try pinwheels and started making half square triangles, cutting the fabric on the bias in order to get bigger triangles. The other half of each square is made from Kona Cotton in white.
Once I had finished 220 squares I tried several layouts after deciding that pinwheels looked too busy without sashing (which I didn’t want to do). I came up with a layout consisting of diamonds that it somewhat symmetrical, but not overwhelmingly so – at least I hope so!
(Click the images for a bigger version.)
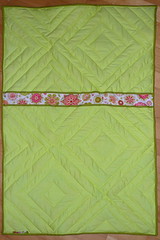
For the back I chose Kona Cotton in Spearmint, which coordinates nicely with the prints, and added one leftover jelly roll strip framed in Kona Cotton Olive for contrast. The binding is also Kona Cotton Olive.
I meant to have the strip intersect the back according to the golden ratio, but it looks a little off… maybe something went wrong when I basted the quilt.
As you can see on the back, I quilted inside the white squares, echoing the seams between white and color, to create a three-dimensional effect, which works quite well because I used a very thick batting.
This time I tried this technique to attach the binding by machine (instead of sewing it to the back by hand) which worked out okay but would probably have been better if I had practiced on some smaller projects before.
I also added a little tag to the lower left corner which I signed with my name and date. You can sort of see it in the second photo.
The finished quilt measures about 100 x 70 cm and consists of 216 squares or 432 triangles – whew!
Two links on color
Design Seeds “for all who love color” shows photos and color palettes derived from them. Great inspirational material if you’re looking for a color scheme for your next quilt or website design or other creative project.
A smart bear: Color Wheels are wrong? How color vision actually works is an article about the color wheel and the primary colors used in print (yellow, magenta, cyan) and light (red, green, blue).
A table runner for my grandma
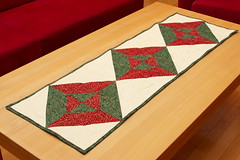
I just realized I never posted photos of the table runner I made for my grandma last Christmas. Loyal readers will remember that she was the one who gave me her old sewing machine and thus inspired me to start sewing. I had sewn a small wall decoration for her the year before, but thought it was high time I made her something on her old sewing machine as a thank you for giving it to me. (As usual, click on the images for bigger versions.)
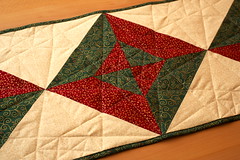
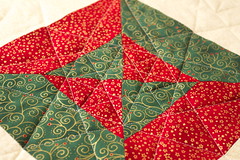
I decided on a table runner made from Christmas fabrics that would hopefully fit on her couch table. On Youtube I found a tutorial for creating blocks by sewing stripes of fabric into a tube and then cutting diagonally and decided to try it out. The tube was a fun and fast way to create these versatile blocks, and the whole table runner came together in one afternoon and evening.
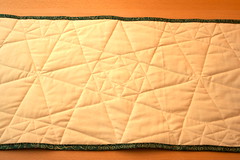
Then the basted table runner spent some time in the living room while I waited for inspiration on how to quilt it. I’m only really good at straight line quilting, and after looking at the squares for a week it dawned on my that I could easily create stars by quilting the squares in straight lines.
The stars are not very apparent on the front, but can clearly be seen on the plain back of the table runner.
Instead of sewing the binding onto the back by hand I decided to sew the binding on by machine on both sides, which worked out just fine. It looks neat enough on the front side, but is a little uneven on the back, but who cares? My grandma liked it!
The quilt is done!
My Plain Spoken napping quilt is finally done!
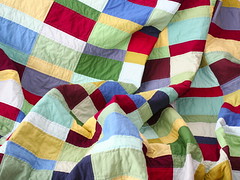
More than a year ago I ordered a Robert Kaufman Kona Cotton Color Card from Pink Chalk Fabric and chose 41 potential colors, of which I ordered a quarter yard each. When the fabrics arrived in January, I played around with them for quite a while until I settled on 24 colors that would go into the quilt: four reds, ten blues and ten greens.
I loosely followed the instructions for the Plain Spoken quilt in The Modern Quilt Workshop by Weeks Ringle and Bill Kerr of Funquilts.
Some technicalities for the fellow quilters among my readers (and for myself as documentation):
The colors are in no particular order
|
|
|
I didn’t sew random pairs of wide and small strips as was advised in the instructions, but placed each rectangle before sewing them together in rows. Then I sewed the rows together to finish the quilt top.
The quilt was machine-pieced and machine-quilted, and the binding was attached to the front by machine as well. I used the Pfaff 230 treadle sewing machine from 1955 I got from my grandma for everything except sewing the binding to the back of the quilt, which was done by hand.
I pressed the seams open, basted with safety pins and quilted using a standard presser foot. I wore rubber gloves during quilting in order to have a better grip on the fabric; I had to move the quilt manually because the feed dogs are not strong enough to pull the weight of a big quilt.
For the batting I used Hobbs Heirloom premium cotton blend (80% unbleached cotton & 20% polyester).
The binding strip was cut 8cm wide and the pieces sewn together diagonally to reduce bulk at the seams. The exception was the part for the red corner, which was sewn together straight because I preferred the finished look. Then the binding strip was pressed in half lengthwise and attached to the front of the quilt by machine. I sewed it to the back by hand using “invisible” stitches, which took ten hours for the whole 7m.
The finished quilt measures 150 x 200 cm (59 x 79 in).
Finally, some photos. Click to see a larger version.
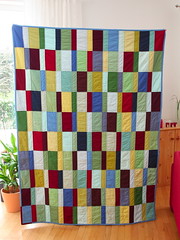
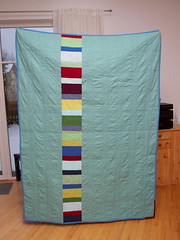
The front and the back side of the quilt. I used some leftover blocks from the front. The main backing fabric is Kona Cotton Sage.
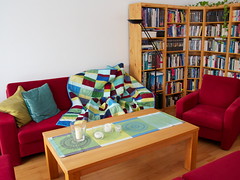
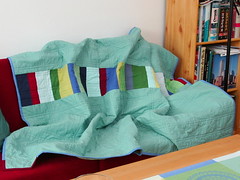
The finished quilt on the couch in our living room. I picked the colors from the couch, the pillows and the table runner.
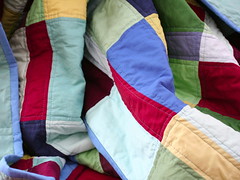
You can see the quilting in this picture. If you look very closely, you can see that the stitch length is not very consistent, unfortunately, because of the difficulties mentioned above.
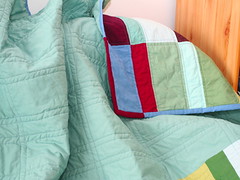
The red corner. When I chose the color for the binding, I didn’t realize that it would match one corner of the front. I didn’t like the idea of a monochromatic corner, so I pieced a bit of red in there. I think it adds a nice touch. You can see it better in this shot taken during sewing.

