
My Plain Spoken napping quilt is finally done!
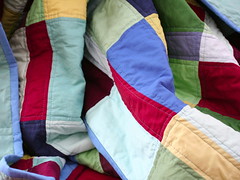
More than a year ago I ordered a Robert Kaufman Kona Cotton Color Card from Pink Chalk Fabric and chose 41 potential colors, of which I ordered a quarter yard each. When the fabrics arrived in January, I played around with them for quite a while until I settled on 24 colors that would go into the quilt: four reds, ten blues and ten greens.
I loosely followed the instructions for the Plain Spoken quilt in The Modern Quilt Workshop by Weeks Ringle and Bill Kerr of Funquilts.
Some technicalities for the fellow quilters among my readers (and for myself as documentation):
The colors are in no particular order
|
|
|
I didn’t sew random pairs of wide and small strips as was advised in the instructions, but placed each rectangle before sewing them together in rows. Then I sewed the rows together to finish the quilt top.
The quilt was machine-pieced and machine-quilted, and the binding was attached to the front by machine as well. I used the Pfaff 230 treadle sewing machine from 1955 I got from my grandma for everything except sewing the binding to the back of the quilt, which was done by hand.
I pressed the seams open, basted with safety pins and quilted using a standard presser foot. I wore rubber gloves during quilting in order to have a better grip on the fabric; I had to move the quilt manually because the feed dogs are not strong enough to pull the weight of a big quilt.
For the batting I used Hobbs Heirloom premium cotton blend (80% unbleached cotton & 20% polyester).
The binding strip was cut 8cm wide and the pieces sewn together diagonally to reduce bulk at the seams. The exception was the part for the red corner, which was sewn together straight because I preferred the finished look. Then the binding strip was pressed in half lengthwise and attached to the front of the quilt by machine. I sewed it to the back by hand using “invisible” stitches, which took ten hours for the whole 7m.
The finished quilt measures 150 x 200 cm (59 x 79 in).
Finally, some photos. Click to see a larger version.
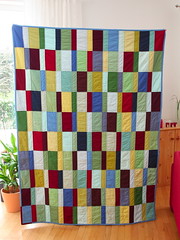

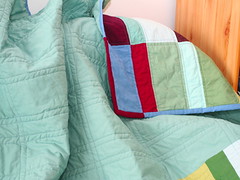
The front and the back side of the quilt. I used some leftover blocks from the front. The main backing fabric is Kona Cotton Sage.
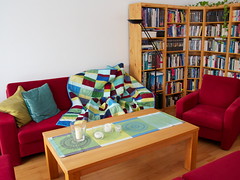
The finished quilt on the couch in our living room. I picked the colors from the couch, the pillows and the table runner.
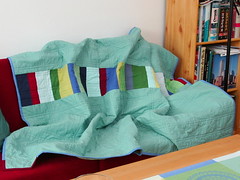
Another shot of the back.
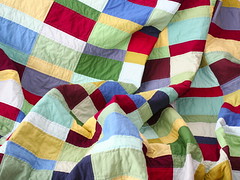
You can see the quilting in this picture. If you look very closely, you can see that the stitch length is not very consistent, unfortunately, because of the difficulties mentioned above.
The red corner. When I chose the color for the binding, I didn’t realize that it would match one corner of the front. I didn’t like the idea of a monochromatic corner, so I pieced a bit of red in there. I think it adds a nice touch. You can see it better in this shot taken during sewing.
Fantastic, Andrea. I especially like the extra ‘feature’ stripe on the back side of the quilt.