Category Archives: Sewing

Endspurt!

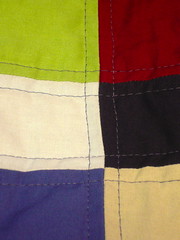
Remember the quilt I’ve been working on? The top was done in May, and I basted it in July, I think. I then started to quilt it by machine, sewing straight lines to the left and right of each seam. This added up to 36 lines lengthwise and 18 across the quilt. The long lines took a very long time because I still use my grandma’s sewing machine which is 55 years old and doesn’t have a walking foot. The feed dogs are not strong enough to pull the entire weight of a quilt, so I had to move it by hand. Cotton fabric is surprisingly slippery, and my hands were tired after a single line. Quilting gloves are not easily available where I live, so I put on rubber gloves and quilted the lines one or two at a time.

This weekend I finally managed to finish the last of the long lines and started with the short ones across the quilt. They turned out to go much faster because the quilt was easier to handle, and I managed to sew them all within one hour on Friday.

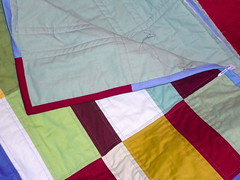
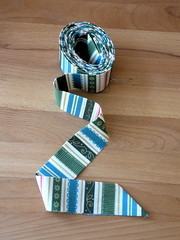
Yesterday I sewed the binding strip out of the light bright blue fabric that appears in the quilt, which took about an hour including ironing the fabric, pressing the seams open and pressing the whole seven metres of binding in half lengthwise. This was followed by a two-hour session at the sewing machine to attach the binding to the front of the quilt. Once again I cursed the lack of a walking foot, but I finally managed to get it done.

Now all that’s left to do is sewing the binding to the back of the quilt, which I do by hand with invisible stitches because I like the look.

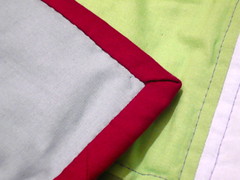
I’m quite sure I’ll never again sew a quilt of this size on this sewing machine, so I want this one to look as perfect as possible. (This includes neatly mitered corners.)

I started this morning with one corner and found that it takes a long time; if my calculations are correct, it might take me as long as twelve hours to sew the whole binding down, but if I spend some time on it every day and do it half an hour at a time, I should be able to comfortably make my self-imposed deadline, which is Christmas. We are going to visit my grandparents then, and I want to show the finished quilt to my grandma. I also may have to make some time to sew a little Christmas present for her in the meantime, but shhh, don’t tell her! ;-)

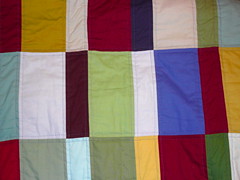
A small finished quilt!

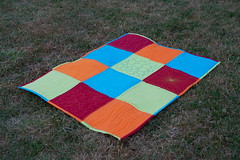
No, it’s not the big quilt from the pictures I posted a little while back, I haven’t worked on it in the meantime because I couldn’t make up my mind whether to use cotton or polyester batting. So I made a small quilt with cotton batting since I’d worked with polyester before. I used some fabric I had initially ordered for the big quilt but then decided not to use. (I think I ordered quarter yards of Kona Cotton Solids in about 40 colours but only used two dozen in the end.) The colours are called ruby, orange, peacock and cactus.

While I was trying new things I thought I’d give free-motion quilting a try. I have a darning foot for my grandma’s machine, but it turns out that free-motion quilting is quite hard if you have to operate the turning wheel with one hand every time you start or stop sewing. This means that you can only hold the quilt with one hand and thus lose a lot of control over it. I tried twelve different designs, some of which I found at Leah Day’s Free Motion Quilting Filler Project and some of which I made up myself. After I had so little success with the darning foot, I changed to the presser foot and had much better results although the going was very slow. The quilting looks alright on the front, but the back shows some minor errors which are very well visible because I used white fabric for the back.

Another new thing I tried was sewing one-step binding on by machine. It worked for the most part, but the mitered corners look a bit bulky because of the seam allowances from the two colours that meet at each corner.

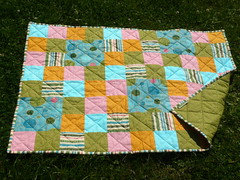
All in all, I think it turned out alright, and I learnt a lot while sewing this 60 x 80 cm (24 x 32 inch) quilt. Here’s a photo, but it’s a bit dark because the sun was already setting. (Yes, the grass in our garden is very dry, we seem to have a bit of a heat wave at the moment…)

Finished Quilt Top

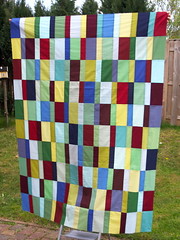
After at least ten hours of sewing yesterday, my first full-size quilt top is finished!

It’s about 150 x 200 cm (59 x 79 in), and the pattern is called Plain Spoken. It’s from Weeks Ringle and Bill Kerr‘s book The Modern Quilt Workshop.

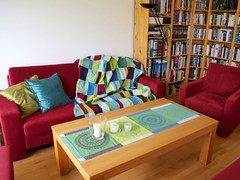
The colours of this quilt were inspired by the colours in our living room, especially the couch, pillows and the table runner:

Now I’ve got to make up my mind about the backing fabric (I’m also going to include at least one row of the front pattern, since I had to re-sew four of them because of a difference in seam allowance), the binding and the thread colour and pattern for the quilting. Any suggestions?

The Plain Spoken quilt pattern seems to be very popular – take a look at other people’s Plain Spoken quilts on Flickr or Dioramarama’s Modern Quiltalong. There also is a Flickr group with photos of other quilts from The Modern Quilt Workshop, the Modern Quilt-Along.

(Wow, three posts in one day, that’s more than I usually manage to do in a month these days!)

My first Quilt

(As usual, click the photos for bigger versions, or see my whole sewing photos set on Flickr.)

After practicing some basic techniques on the pillowcases I sewed my first patchwork quilt this summer. Since it was a present for two friends’ first baby, I am only posting it now, after I gave it to them.

I spent a lot of time at the fabric shop selecting the prints for the quilt. The decision was not easy because I didn’t know if they were going to have a girl or a boy, and I also wanted the quilt to not look dirty after every use, so I picked fabrics in bright, but not too light colours.

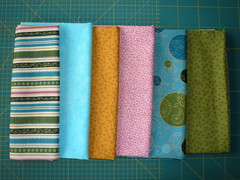
I fell in love with the blue fabric with the blue, green and pink circles and picked the other fabrics to match the circles or the striped fabric that I chose. The blue fabric with the circles and the striped one are both from Bernartex’s line City Girl Holiday.

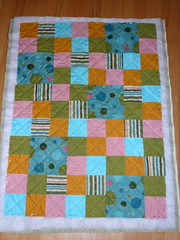
I wanted to use small squares for the quilt, but the print of the aforementioned fabric looks better in bigger pieces, so I cut it into squares the size of four small squares.

I experimented a while with the layout, then sewed the squares together. Here’s the finished top.

Then I put together the quilt sandwich. The three layers are held together by curved safety pins. I used more than 150 of them!

Before I started the actual quilting, I did a little test run because I have never worked with batting before and was not sure if my sewing machine could handle it, but it worked beautifully. I used a medium polyester batting in this quilt and decided to quilt diagonal straight lines to keep with the geometric theme of the quilt. (I also tested the binding, as you can see.)

This is how the quilting looks on the actual patchwork quilt.

I decided to use the striped fabric for the binding. The binding strip is more than four metres long, as the finished quilt size was about 90 x 110 cm.

I sewed the binding on by machine on the front, as you can see in this photo. I tried to match the print while sewing together the binding strip, and on the finished quilt you can hardly see the seams in the binding – well, except for the last one, which was of course determined by the circumfence of the quilt rather than the print on the fabric.

Then I sewed on the back with a blind stitch. It took the better part of two afternoons, but it was worth it because it looks very neat and you cannot see the stitches. As a finishing touch I added a little label, on the back of which I wrote my name and the date.

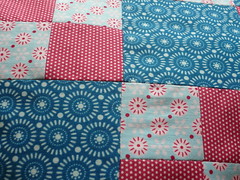
Here’s the finished quilt. The back is one piece of the green fabric.

If you look very carefully, you can see two of the “invisible” seams on the binding in this photo:

I used and can recommend two books on quilting:

I also got some inspiration and instruction from the Quilt-Along tutorials at Oh, Fransson!, though I think my version of the binding looks a little neater than this because you cannot see the stitches.

For some tricks with the binding I watched the How to Quilt videos by Shelly Cordsen on Youtube, especially the one on how to connect the binding as a bias strip.

It turned out that sewing a patchwork quilt was not as difficult or complicated as I had thought, but I have to admit that I chose a simple pattern for my first try. Now I’ve only got one problem: I see lots and lots of gorgeous quilts on the net, for example on the Modern Quilt-Along pool on Flickr, but most of the fabrics seen in the photos are only available in the USA. You can buy some here or order from there, but that’s quite expensive. My next project is going to be a quilt for myself (probably napping-sized), and I’m sure it would cost a small fortune if I ordered fabrics for that there instead of buying locally or ordering from a German online shop. Maybe I’ll have to go on another trip to the US sometime? ;-)

Another pillowcase

This spring I sewed another pillowcase, and with all the experience I’d already gained while sewing my first one ;-) I decided that I needed a challenge. This pillowcase consists entirely of fabric squares, but they are sewn together diagonally. It was a gift for a friend’s baby boy.

(As usual, click on the photos for a bigger version. Here’s the whole set at Flickr.)

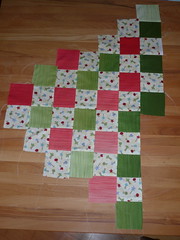
This is the layout of squares I came up with. They are then folded and sewn together to form a pillowcase with a diagonal opening in the back.

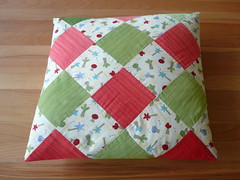
Unfortunately, this is not the easiest layout possible, and it was quite difficult to sew the sides together because I had to change directions so often. But of course I persevered. Here’s the finished pillow, front and back:

There are no seams along the sides of the pillow, as you can see here:

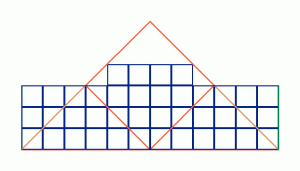
Of course there is an easier way to sew a pillowcase in this pattern, as was pointed out to me by a friend who also sews. She is good with mathematics and all kinds of crafts and came up with this layout:

The blue squares are the fabric squares, sewn together. You fold along the orange lines and sew together along the red and then the green lines.

Of course, I then had to make my friend a pillowcase of her own, using her great layout idea. This time I used three different fabrics again, but made some of the squares out of smaller sqares. Here’s my layout plan:

For the squares that consist of four smaller squares, I first sewed two long stripes of fabric together.

Then I cut the stripe into rectangles…

… which I then sewed into squares.

This was also my first project in which I pressed the seams open instead of to one side, as recommended by Weeks and Ringle in their book The Modern Quilt Workshop.

I have to agree with the authors that the finished product just looks neater.

Here’s the finished pillow. The fabric is from the Tilda line by Tone Finnanger, by the way.